How To Plant Tomato Seeds And Grow Tomatoes At Home

Tomatoes are one plant that many people grow from seed and is a plant many beginners start with. Tomatoes are relatively easy to grow, used by most people and are extremely tasty when grown at home.

Your first step is to select the seeds that you want to grow. There are a huge variety of seeds and I personally prefer the heirloom varieties of seed. This are much more natural and tend to produce tastier tomatoes. These can be bought online in the UK and the US from Amazon or from your local garden centre.
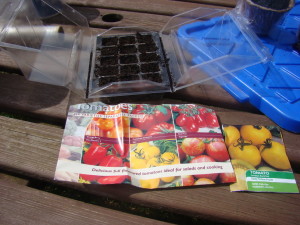
Growing tomatoes from seed 1My favourite varieties are yellow tomatoes, which are uncommon and expensive in the shops here in the UK. I do a lot of cooking with tomatoes so tend to grow a lot of them from cherry tomatoes through to plum and beefsteak tomatoes.

When you are planting seeds you first need to prepare a seed tray with a good quality potting compost (store bought or your own) and make sure there is about a centimetre gap between the top of seed tray and the top of the soil.

Place a single seed in each square or space the seeds about 2 inches apart. Just gently push them into the soil, not far down, just enough to stop them from blowing away. This allows you to see where all your seeds are placed and to make sure they are well spaced and you haven’t forgotten any.

Now gently sprinkle a small amount of compost, about half a centimetre, on top of each seed and gently press the soil down. You do not need to be too vigorous here, just enough to keep the soil in place. A looser soil will help the seed to push through and get to the surface and you will be repotting these soon enough.
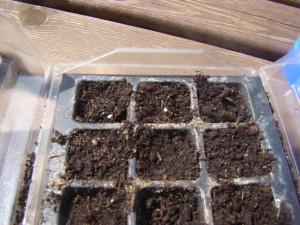
Growing tomatoes from seed 2Then water the seeds in and cover them. Either use cling film (plastic wrap) and wrap it over the seed tray or use a plastic propagator lid.

If you are using cling film then you need to make sure you check your seeds daily as this can keep too much moisture in the seed tray and cause mould to grow.

Then place the seed tray somewhere warm and bright and in a week or so you should find some seeds pushing up through the soil. Check the soil daily and if it is too dry then water it but careful not to over water it. If the watering reveals the seed then just gently push it back under the compost or scatter more on it – this can happen and you do not need to panic.

As the seedlings grow to a size where they have 2 or 3 leaves then you will need to remove them from the seed tray and put them in to individual pots so that they can grow. You do want to put them in to individual pots before they grow too large so that you do not damage the roots which can stunt the growth of the plant.

Read more in the next entry on re-potting and growing tomato plants (coming soon).

Facebook
Instagram
LinkedIn
Twitter
YouTube

Clearing An Allotment – How To Get Rid Of Weeds And Prepare Your Soil

Clearing An AllotmentWhen you take over a new allotment it is more than likely going to be at least knee deep in weeds or worse. Only the very, very lucky find a nicely presented plot that is ready for planting. Please expect quite a lot of work in clearing the allotment but it will be worthwhile in the long run. Many allotment societies will also give you a discount on your first year if you are taking over a heavily weeded allotment.

When our allotments opened the plots were covered with weeds and many of us ended up hiring a local farmer to plough over the plots. The real problem came from the very stony soil; there were bricks, building rubble and large stones in the soil, all of which needed removing before planting began.

Tackling the weeds can be a daunting challenge and it can be very off-putting for you. Depending on your personality type you may want to tackle the whole lot of just work on a section at a time.

You may be tempted to hire a Rotavator, which can be a big time saver. The real problem with one of these is that they chop the pernicious weeds up into little pieces and spread them over your allotment. So instead of having one dandelion you end up with the roots scattered all over and lots of dandelions will grow from them. However, they are worthwhile using if you are then going to clear the allotment properly. Some people will remove weeds like dandelions and thistles by hand before using the Rotavator in order to avoid this problem.

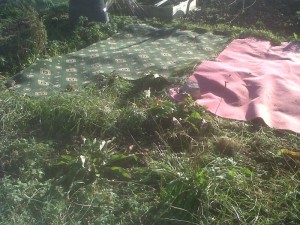
A good technique is to cover your plot with thick black plastic, cardboard or old carpet. This will suppress the weeds and make it easier to manage, though remember to weigh it down with bricks so that it does not blow away. Plastic is the best material to use as it does not degrade and is re-usable, but it will have to spend money to buy it!

Cardboard is a good material and you are likely able to get this free from a shop near you. This will break down after a year in to the soil and will cause no damage or problems. Carpet you can get free from a carpet fitters as they will be happy to give you old carpets they have lifted from houses. However, carpet will last for about a year before it starts being absorbed into the soil and weeds growing though it, which is problematical. Carpet is not very good for your soil and does not break down very well so if you are using it then you need to clear the area before the carpet starts going funny.

My personal approach has been to clear an area, plant it and then move on to the next area. It appeals to my mindset and the time I have available, plus it means I am getting results. Once an area is clear it gets tackled with a hoe two or three times a week to keep the weeds down. This is really important as otherwise the weeds will take over and you will be right back at the beginning.

When you are clearing an area you need to dig a good spade’s depth down and turn the soil. Break up the lump of soil, carefully avoiding damaging any dandelion/thistle/dock roots, and remove all the weeds and stones. The weeds can be composted and the stones disposed of. With large tap roots you will want to dispose of them rather than compost them as in most compost heaps they will not break down enough to stop them from rooting when the compost is used.

With grass, clover and groundsel you can remove the roots from the soil and then dig the weed in. It will break down and provide some nutrients for your soil.

If your allotment has brambles or nettles then you will need to dig out the roots and dispose of them. The nettles can be used to make nettle tea but the brambles are worth disposing of rather than composting.

You may be tempted to use a weed killer on your allotment though you are best not to. A weed killer will effect the plants you are growing, though if you are not planning on planting for some time you can probably get away with it as the chemicals will have gone by the time you plant (but the weeds may come back). Check your allotment society rules though as many do not permit the use of chemicals so you may have to go organic. You can make your own weed killer and use that if you prefer.

Once the ground is broken up and the weeds removed then you can dig in some fertilizer. A well rotted manure (horse or chicken is great) or other compost will be perfect and will ensure the soil is full of nutrients. In all likelihood the soil is going to be good because it hasn’t been grown in, but it is worth ensuring it has plenty of food for your plants.

When your allotment is dug over you are then ready to plant. Just make sure you take the time two or three times a week to hoe your allotment to keep the weeds down. It ensures the whole plot stays manageable and that the weeds do not crowd out your plants.

Facebook
Instagram
LinkedIn
Twitter
YouTube