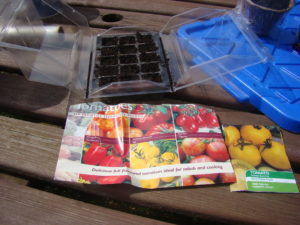
There are a bewildering amount of tomato seeds on the market in all sorts of shapes and sizes. There are tiny tumbling tomatoes no larger than your fingernail, sweet cherry tomatoes, meaty paste tomatoes, juicy salad tomatoes, and the giant beefsteak tomatoes. Not only do you have this choice, but there are lots of different colors available too, not just the commonly found red tomatoes! Now you can buy tomato plants that produce fruit ranging in color from orange to yellow, green, purple, chocolate, black and deep crimson.
With over 3,000 varieties of heirloom tomatoes actively cultivated and over 15,000 known varieties, it can be very difficult to decide what to grow.
Firstly, decide whether you want to grow from seed or buy pre-grown plants. If the former, then you have a much wider selection as the pre-grown plants tend to be the same few varieties such as Gardener’s Delight or Moneymaker. Occasionally you may find more unusual varieties such as a yellow tomato or Tigeralla or even a black tomato, but these are much harder to find.
When growing from seed, you need to start your plants now or in the next month so that they have time to mature, fruit and ripen. If you are in a colder area with a short growing season, it is important to start them off indoors early so they are fruiting and ripening when the weather is right for them. Pre-grown plants can be bought much later in the season around the time, or just after, the last frost. Remember, tomato plants are not frost hardy!
Be adventurous with your choice of tomatoes, don’t just grow the same tomatoes you can buy in the store, choose some varieties that are unusual, different and not available from the shops. I have my favorite varieties, but every year I like to try one or two new cultivars that I’ve not grown before. Each year, new types of plant are brought to market, so there is always something new to try!
One thing to consider is whether to grow determinate or indeterminate tomatoes.
Determinate tomatoes are known as bush tomatoes. They grow up to about three feet tall, set buds at the end of the branches which form flowers. The fruit all ripens at once and then, usually, the plant dies back. These are great if you don’t have a lot of space, haven’t got the time to prune your plants, or you want a lot of fruit ripe at once to can or make into something. There are fewer varieties of bush tomato, but you can usually find a variety that is the size and color you want to grow.
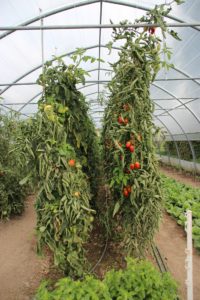
Indeterminate tomatoes are the type of plant people are most familiar with. These are the vining tomatoes that need supporting and grow like crazy. These have to be pinched out and will continue to produce fruit until they are killed off by frost. Indeterminate tomatoes produce very large crops of tomatoes over a longer period as the fruit does not ripen all at once. These are great for eating as you do not end up with a glut of fruit. Typically, you limit the growth of this type of tomato so that it can ripen the fruit.
Whether you are growing in the soil or in containers will also influence your choice of seeds. Bush tomatoes are better suited for containers as their size is limited whereas indeterminate tomatoes need larger containers because they grow so big. Tumbling tomatoes are excellent for hanging baskets and make for a striking, edible display.
Which you choose to grow is up to you. I recommend picking some you like, so if you regularly buy cherry tomatoes or salad tomatoes, grow some of those. Instead of growing a normal red cherry tomato, grow a yellow cherry tomato such as Golden Gem or a pear yellow tomato such as Nugget or an unusual crimson tomato such as Midnight Snack.
If you fancy something more unusual, try growing Cherokee purple for giant, beefsteak tomatoes that are a lovely shade of purple. Big Rainbow is another beefsteak variety worth growing due to its unusual striping. One of my favorites is Mortgage Lifter, which are giant red tomatoes. They got their name from the farmer who developed them. He was on the verge of losing his farm when he developed this variety of tomato which he sold at markets. It was hugely profitable for him and he was able to pay his bills and save his farm, including paying off his mortgage, hence the name!
There are lots of varieties out there and you will even find that different seed companies stock different varieties plus may have exclusive varieties. Choose some that you like and pick one or two varieties that are purely for fun, as an experiment; you never know, you may find a new favorite tomato!
Tune in to the next installment to find out the difference between F1 and Heirloom tomatoes and to learn what you need to start your tomatoes off!
Discover everything you need to know about growing tomatoes in my new book, “Growing Tomatoes” available in paperback and ebook in the UK here and the rest of the world, including the USA here.
