Growing Giant Pumpkins – Planting the Seeds

This year I’ve decided that I’m going to grow some more giant pumpkins. After the spectacular failure last year where they just refused to grow, which I’m putting down to poor soil and a bad location, this year I am in a new location with much better soil and a regular supply of manure.

I have two lots of seeds. The first are Dills Atlantic Giant, which are a favourite for growing large pumpkins. They are easy to get hold of and will reliably produce good sized pumpkins. It is easy to grow one over 100 pounds without too much effort.

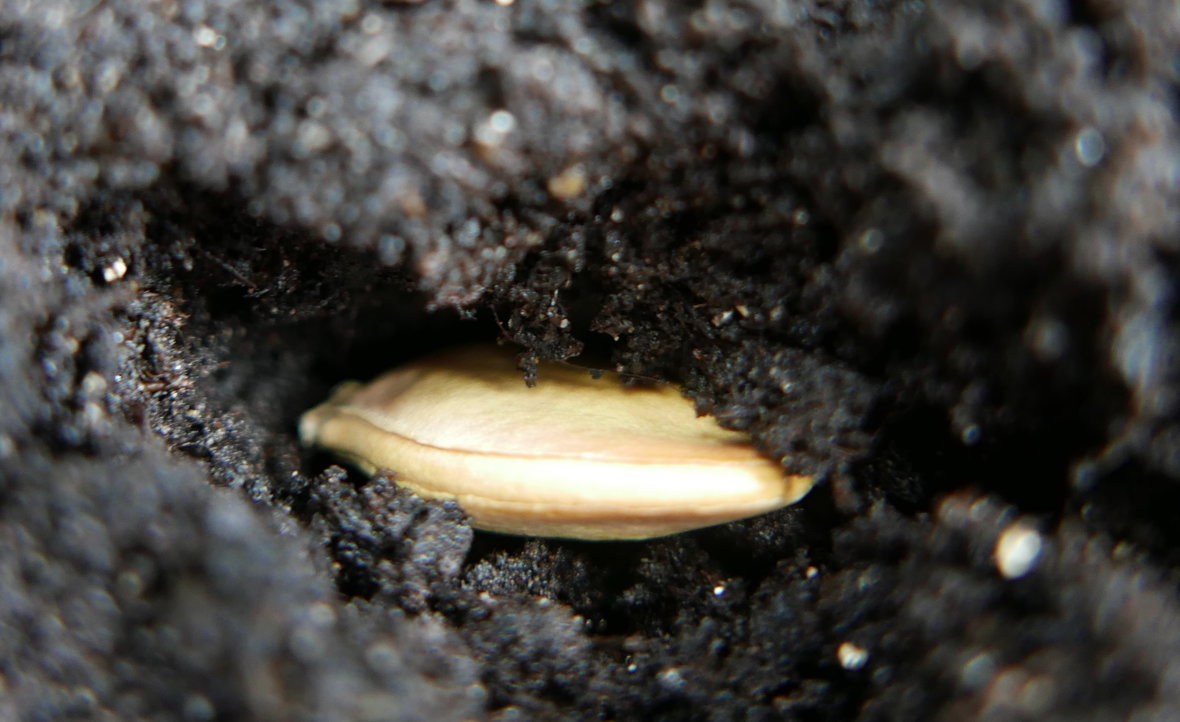
The second set of seeds are much more precious. I bought four seeds from a 1367 pound giant pumpkin. They were not cheap, a single seed costing more than a packet of Atlantic Giant, but well worth it I think.

giant pumpkins seeds

You can see from the above picture the difference in size between the seeds. On the left is the Atlantic Giant and on the right the Giant pumpkin. The latter seed is much larger and much thicker than the Atlantic Giant, so it is looking promising!

I have planted all four of the giant pumpkins as well as a couple of Atlantic Giant seeds too as a backup. They are quite late planting here because the weather has been extremely cold and wet over the last few weeks. Today we’ve had snow, hail and frost, so it is probably just as well the seeds weren’t planted early.

The seeds have been put in a high quality seed compost. Last year I used cheap seed compost and germination rates were terrible. This year I’ve bought a more expensive compost and, so far, germination rates have been very high. This compost has perlite mixed in with it, which will help with drainage and moisture retention.

giant pumpkin seed planted

The seeds have been put in to reasonably large pots (5 inches across) rather than planting in smaller pots and then transferring them. Every time you transfer your plants you run the risk of damaging them or them being unhappy with the transfer and their growth being stunted. These are special pots which have plastic covers on them, which turn them into mini greenhouses.

I’ve planted the seeds on their side because I discovered last year that pumpkin seeds have a top and a bottom. My children helped me plant last year and after a couple of weeks I wondered why no seeds had germinated so dug around in the pots. I discovered that the seeds had germinated and the leaves were going down into the soil and the roots had bent round to try to get into the soil. Turns out the pumpkin seeds had been put in with the pointy end down, which is where the leaves come from! I did rescue the plants and they all survived, but I had since decided that planting all squash seeds on their side is desirable.

Once covered and watered in, the pots, with their covers, have been put in a plastic greenhouse to germinate. I’m hoping for good things and will keep you updated on their progress over the year!

Facebook
Instagram
LinkedIn
Twitter
YouTube

Sweet Pumpkin Pie – How To Easily Make Delicious Pumpkin Pie

When growing pumpkins you can easily end up with a glut of them at which point you are left wondering what on earth you are going to do with all those pumpkins. Of course, you can carve some for Halloween, but there will invariably be some left over.

Rather than go to waste you can make a delicious pumpkin pie out of them, as well as other great dishes. Our American cousins will be familiar with pumpkin pie as it is a traditional dish served around Thanksgiving but in England, it is a less well-known dish.

pumpkin for roasting image

Pumpkin pie is one of my favorite things to do with the pumpkins I grow, and I usually use a small variety designed for cooking for pie such as Jack O’ Lantern as they have more flavor than the giant varieties. Of course, you can use canned pumpkin which is easily found in the USA. In the UK it is almost impossible to find on the supermarket shelves but it can be found in Waitrose. Fresh is best and you can roast the pumpkin, freezing the pumpkin flesh for use later in the year.

To make this pie really tasty, make sure the pumpkin is thoroughly pureed, until completely smooth. Any lumps or stringy bits will detract from the taste and texture.

Ingredients:

  • 500g (1 3/4 cups) Pumpkin – approximately half a small pumpkin) or a 15oz can of pumpkin
  • 3 x 9″ sweet pastry cases (store bought or home made)
  • 397ml (1 tin) sweet condensed milk
  • 2 large eggs
  • 175g or 2/3 cup firmly packed light brown sugar
  • 2 tablespoons white sugar
  • 1 1/4 teaspoons ground cinnamon
  • 1/2 teaspoon salt
  • 1/2 teaspoon ground ginger
  • 1/2 teaspoon ground nutmeg
  • 1/4 teaspoon ground cloves

Method:
1) Cut the pumpkin in half and scrape out the seeds and stringy insides with a spoon (wash and roast the pumpkin seeds or keep for planting next year).
2) Cover a baking tray with foil and grease lightly.
3) Pre-heat your oven to 180C/350F.
4) Place the pumpkin halves face down on the tray and spray with cooking oil.
5) Put the tray in the middle of your oven and cook for between 30 and 50 minutes (depending on the size of the pumpkin) until a knife can be easily pushed through the pumpkin.
6) Remove the pumpkins from the oven and allow to cool until they can be easily handled.
7) Using a spoon scrape out the flesh inside of the pumpkin into a bowl being careful not to get any of the skin.
roasted pumpkin picture
8) If you are not using all of the pumpkin, then allow the excess to cool and then freeze.
cooked pumpkin picture
9) Put the cooled pumpkin into your food mixer together with the egg yolks and egg.
cooking pumpkin pie picture
10) Blend for about 2 minutes until smooth. You may have to scrape pumpkin off of the mixers halfway through as it will get tangled in the blades.
11) Add the rest of the ingredients to the mixer and blend for a further 1 to 2 minutes until smooth and thoroughly combined.
12) Preheat your oven to 220C/430F.
13) Put the pie cases onto trays (to catch any spillage) and carefully pour the pie mixture into the cases until full.
preparing pumpkin pie image
14) Very carefully as it is easy to spill the pie mixture put the trays into the oven.
15) Cook for 10 minutes then turn the heat down to 175C/350F.
16) Cook for a further 40 to 50 minutes until a knife inserted an inch from the edge of the pie comes out clean.
17) Remove from the oven and allow to cool before serving warm with your choice of cream!

Simple isn’t it? Plus it tastes absolutely delicious. Enjoy your pumpkin pie, I hope it becomes as popular in your household as it has in ours!

Pumpkin pies

Facebook
Instagram
LinkedIn
Twitter
YouTube