Allotment Diary – 1st June 2014 – Potatoes, Peas And Weeds

Another entry in the allotment diary where I finally finish digging over and weeding the potato patch. My late potatoes are certainly living up to their name and are late! I now have 7 rows in and another 1 to go – unfortunately I was digging without my glove on and have a very nice (and painful) blister in the middle of one of my palms.

I will show you how I plant potatoes without all the hassle of digging trenches, which is frankly back breaking! It is much easier and quicker and you do not need to earth up so much, if at all. We will also look at the peas which I planted a couple of weeks ago. The shoots are just starting to come through but fewer have germinated than I would prefer. I will be soaking some seeds this week and planting those in the gaps.

The rhubarb is still going crazy, had four more decent sized stalks off it today, and the parsnips are now six feet tall and flowering … will attempt to gather the seeds before they blow everywhere!

Enjoy the video and please leave a comment with your thoughts and tips!
Facebook
Instagram
LinkedIn
Twitter
YouTube

Planting Peas And Protecting Them From Pigeons

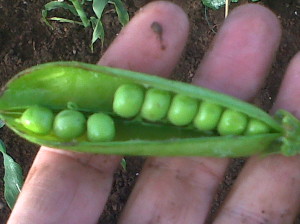
Growing Peas At HomePeas are a great crop to grow at home. They do not require a lot of space as they grow upwards, they are fast to mature plus they are absolutely delicious. You will be surprised how many peas do not make it to the kitchen table because you end up eating them straight from the pod!

There are a lot of varieties of peas, including some overwintering ones. It is up to you which you grow. In the video below I show you three varieties; a petit pois (small and sweet), a sugar snap (small and sweet and a favourite with children) and a main crop, which tends to be larger and can get a bit tough if left too long.

You can use succession planting with peas if you prefer though I’ve found they all mature at different times anyway so I tend to plant a bed of peas all at once and then freeze what I don’t use.

Peas need to be about half an inch or a centimetre under the ground and can be planted in straight lines. I tend to plant mine in zig zags as you will see in the video below because I think you get more peas in the ground plus it helps a little with air circulation, which reduces the risk of fungus or mould.

Space each pea seed a couple of inches apart and then when you have planted the row, cover the seeds over with soil and gentle pat down. Once the entire area is planted then give them a thorough soaking as you need the peas themselves to get the water.

Peas can get attacked by pigeons so it can be worth netting them if it is likely to be a problem. I tend to use pea sticks to support the plants and these are usually annoying enough to keep the pigeons away. You can use nets for the peas to grow up if you prefer. Whilst you can buy pea sticks from shops you are far better to keep the prunings from your trees and let them dry out thoroughly. Be careful about putting green sticks in the ground as some of them will have a habit of taking root!

You may find a proportion of your peas do not germinate and you can just put more seeds in the spaces where no plants came up. Alternatively you can soak the pea seeds overnight before planting and that will increase the chances of germination.

When you are shelling peas, keep hold of the pea-pods because you can make a surprisingly tasty wine from them, which I will show you in another article very soon. It sounds weird I know but it is a fantastic wine to make using what many people consider a waste product!

The Allotment Diary video below will talk you through the process of planting peas and please leave a comment and your tips for getting a great crop or your favourite varieties!

Facebook
Instagram
LinkedIn
Twitter
YouTube